
Wordpress Image Sizes
If your images are too big your website is going to load slowly, your users will be impacted and so will your search rankings.
Resizing images before uploading
When we talk about resizing images, we mean optimising the dimensions and resolution of your images prior to uploading them to your site. Whilst image optimisation plugins are available, they are not always installed on your website (e.g. your server many not support it, you might not have a license) so nothing beats forward thinking.
Dimension vs resolution
Dimensions are pixels (width and height)
Tools that work well are: preview (Mac), paint (windows). More information about resizing images.
Resolution is level of detail in the image. Tools that work well are:
tinypng.com.
Image format simplified
- JPG: for images without transparent background
- PNG: when you need transparent background
- WebP: newer file format for images on the web. Offers up to 34% smaller
file size than JPG and PNG. Supports transparency. More information about WebP here.
Naming your images
- Name your images something meaningful before uploading them e.g. 3-bedroom studio.jpg vs DCIM43424.jpg
- Get in the habit of adding alt text and caption once you have uploaded your image (directly in the media library)
Process
-
- If required, download the unoptimised images from your website, resize them
- Reupload them using the enable media replace WordPress plugin
Critical knowledge
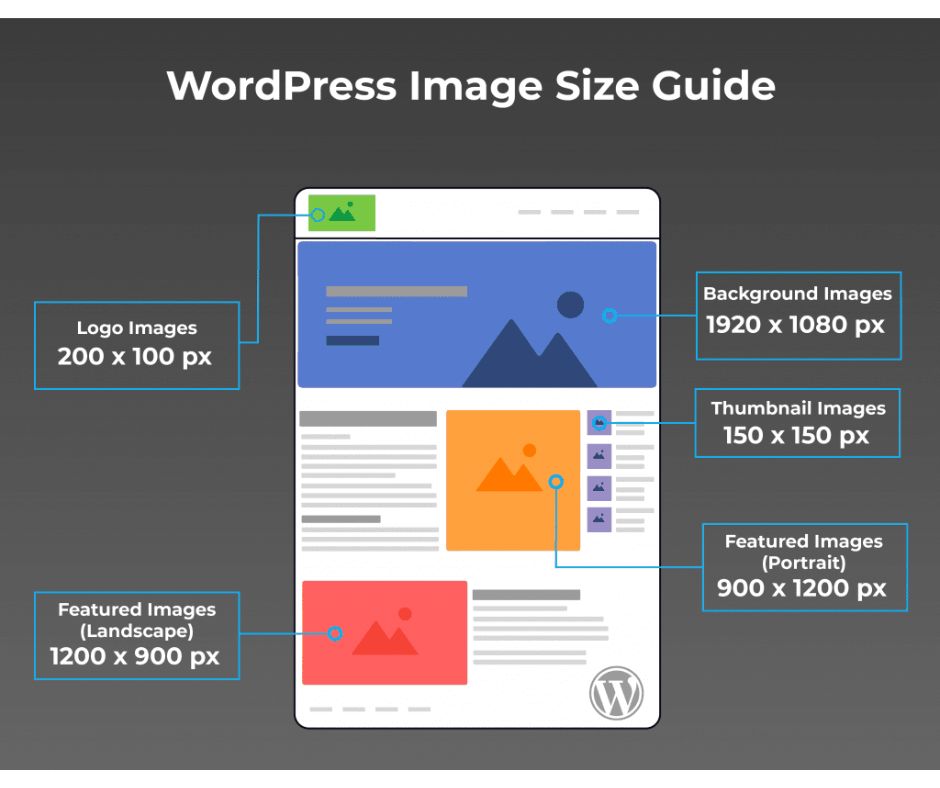
Once you understand that the width of a computer monitor is about ~ 1920 px wide and the size of your website container is about ~1200 px, it is easy to come up with the right image sizes.

What is the right size?
Before you upload your images to WordPress you need to know where you will use them in order to choose the right size.
- If you intend to use them as a full-width banner (hero) you’ll best resize them at 1920x1080px (16:9 ratio) – same as banner image above).
- If you intend to use them as container-width banner (hero) you’ll resize them to 1200 x 720px (16:9 ratio).
- If you intend to use them within the content (and not banner) in landscape, upload them at 1200 x 900px (4:3 ratio). in portrait 900px x 1200.
- Your feature images need to be 1200 x 900px (same as content image above)
- Each image should be a very maximum of 150kb in size, except for the banners that may require to be heavier, up to max 275kb in size.
Once you upload your images, WordPress will automatically resize them to 4 sizes (and keeps your full image size as uploaded) as defined in your wp-admin>settings>media. Your web developer may have changed the default sizes.
When you insert the image in your page, select from the best size depending on the location:
- Thumbnail: 150×150 px
- Medium: 300×300 px
- Medium-large: 768x768px max (not visible in the media settings)
- Large: 1024 x 1024 px max: feature images, gallery images, content images
- There may be a few extra image sizes that appear from plugins or your theme.
